I absolutely adore cooking curries and spend a lot of my time re-creating my mums recipes, including all the delicious dishes I grew up eating. One of my all time favourites was pretty much a staple in my Pakistani family life, but always hit the spot. Keema Muttar, A.K.A – Lamb mince curry with peas.
If you get the basics down, it’s very easy to make and combined with some freshly made Roti’s A.K.A – Chapatti’s then this all goes down a treat.
- Preparation time: 30 mins
- Cooking time: 1 hour
For the Keema you will need:
- About 500g of lamb mince
- 2 onions
- 4-6 cloves of garlic (depending on how big the cloves are)
- 1 chunk of ginger (cut to around half of your thumbs size)
- 5 green chillies
- 1 tablespoon of coriander seeds to make the dhanajiru spice
- 2 tablespoons of cumin seeds to make the dhanajiru spice
- OR 1 and a half tablespoons of store bought dhanajiru
- 1 teaspoon turmeric
- Half a teaspoon of cloves
- Half a teaspoon of black peppercorns
- Half a cinnamon stick
- 2-3 tablespoons of garam masala
- 2 heaped teaspoons of salt (if it’s too little you can add more after tasting towards the end)
- 1 can of plum tomatoes
- 2 large handfuls of frozen peas
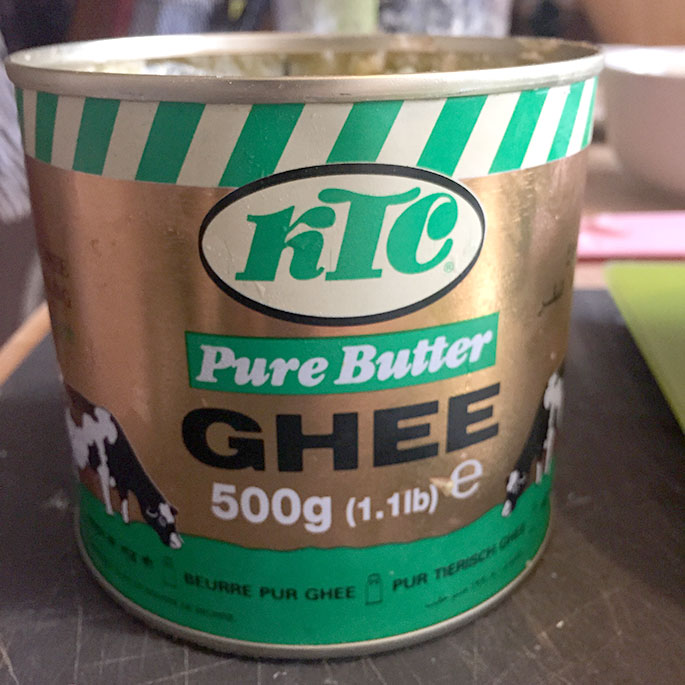
- 2 large tablespoons of butter or ghee (around 35-40g)
Now, I know the above looks like a lot but these spices can keep fresh in your cupboard for aaaages so they are a worthwhile investment and can transform your cooking skills. Once you learn how to make a homemade masala base for your curries, you will never use those shitty sauce jars ever again.
For the Roti you will need:
- 1 large mug full of chapatti flour (depending on how many you’re cooking for!)
- Half a mug of water (if it’s too little add more, but always better to initially add in less than more)
- 1 tablespoon of melted butter, ghee or olive oil (optional)
Keema
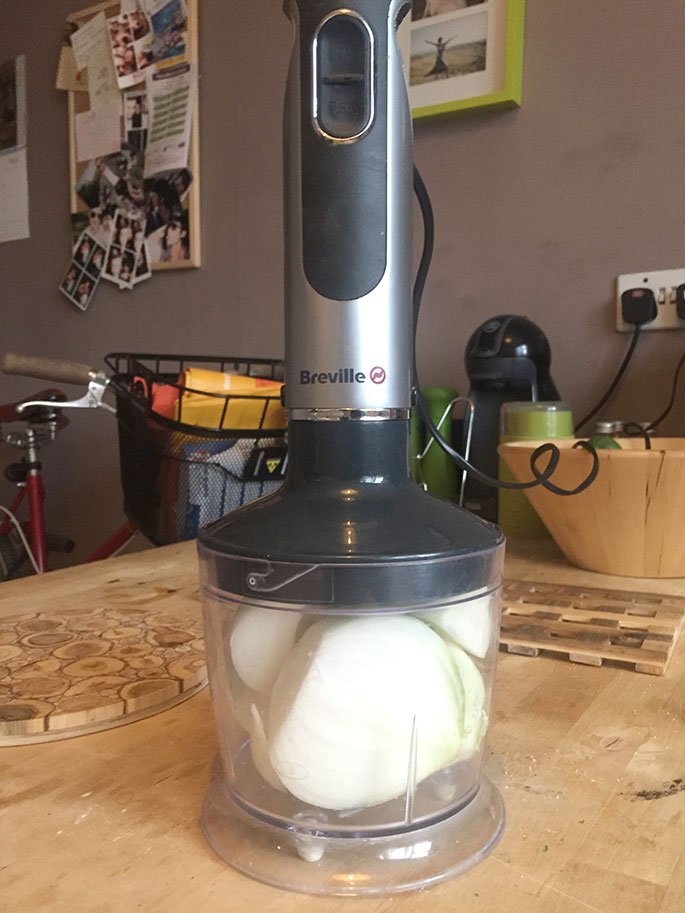
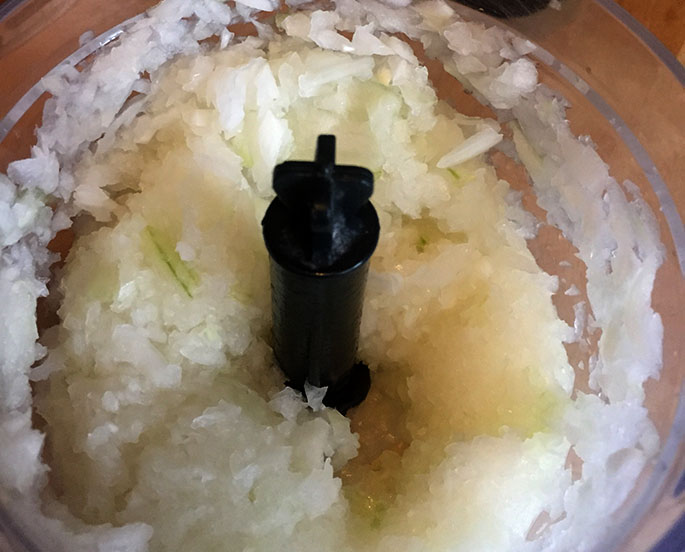
There are normally a lot of onions involved in indian cooking as it forms the base of the masala. So, as well as being a fan of cooking curries, I’m also a big fan of spending as little time on preparation as possible. One of my all time favourite kitchen gadgets is the Breville Hand Blender. Chopping onions and mincing garlic is a thing of the past with this little machine! I simply peel the onions, halve them and away I go. Perfectly chopped onions in no time without any faffing around with a knife.
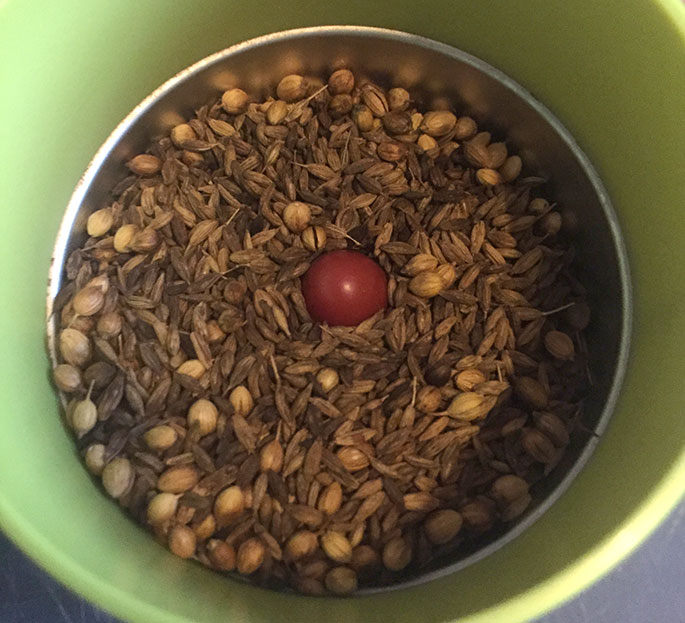
During the prep, I also quickly made some fresh dhanajiru, which is a spice blend of coriander and cumin. Now, you can buy this from a shop, as you can with garam masala too – but trust me, blending your own spices has a huge, huge, MASSIVE impact on the flavour of a curry.
If you don’t believe me, try it one day.
Growing up, my mum had a grinder which she used to blitz all her spices. When I left home for the first time to go to uni, I always used to use pre-blended spices, and remember complaining to my mum that they never turned out as tasty as hers. The grinder was why.
I usually blitz together my own garam masala too. You want to start by slowly roasting the cumin and coriander on a dry pan like so:

On a gentle heat, please don’t burn these precious seeds! You’re simply unlocking their flavour by roasting them for a minute or so. Then transfer to a grinder whilst still warm:
If you don’t have a grinder, use a pestle and mortar and honestly, if you just can’t be bothered with the faff, feel free to just buy pre-blended spices or just mix pre-ground cumin and coriander together.
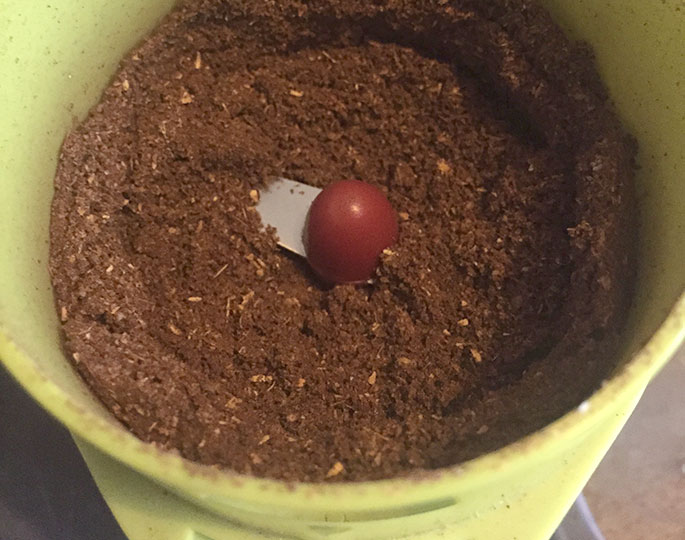
The smell this powdered spice gives off is immense. As it’s freshly roasted, the full potential of flavour these seeds have to give is revealed.
Moving on.
Set the chopped onion aside, and put around 2 tablespoons of butter into your cooking vessel of choice. Now, I went for ghee instead and there is absolutely no requirement for it to be this. I just really, really love the taste. Honestly, you can use english butter or even coconut oil if you prefer! For me though, ghee conjures up smells and flavours from growing up. A tiny bit of this can also be used to brush naan and roti’s before serving too! You can generally pick this up from most superstores if they have a world food aisle, or any asian food shops.
Now start with heating up the ghee, butter, oil – whatever – and add in some cloves, black peppercorns and cinnamon.

Then drop in the chopped onions.
PRO TIP: Make sure the oil at this point is not exceptionally hot. If it is, as soon as you add the onions it will pop and spit hot oil EVERYWHERE. You’ll burn yourself. Slowly does it.
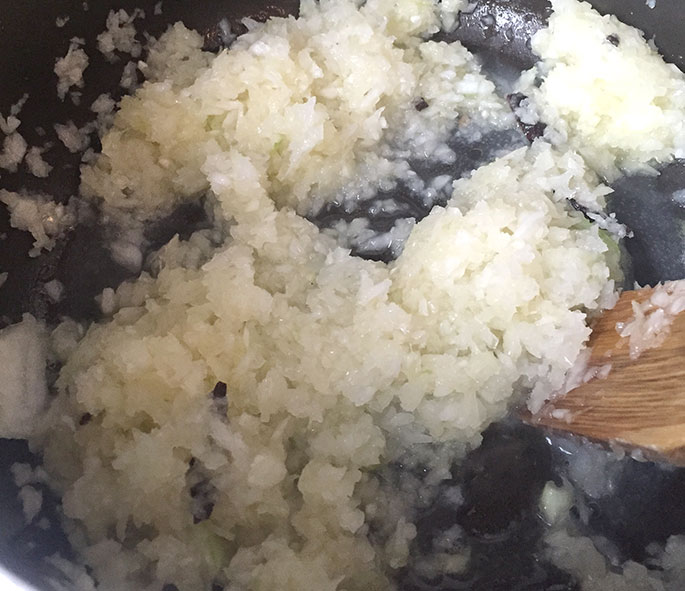
Keep the onions cooking on a medium heat until it’s a nice golden colour like so:
Please make sure you don’t whack up the heat as there is nothing worse than burnt onions as the base of your curry. It will make it unnecessarily bitter. I kept the heat at medium and and browned the onions in just under 10 minutes and was constantly checking to ensure it wasn’t burning.
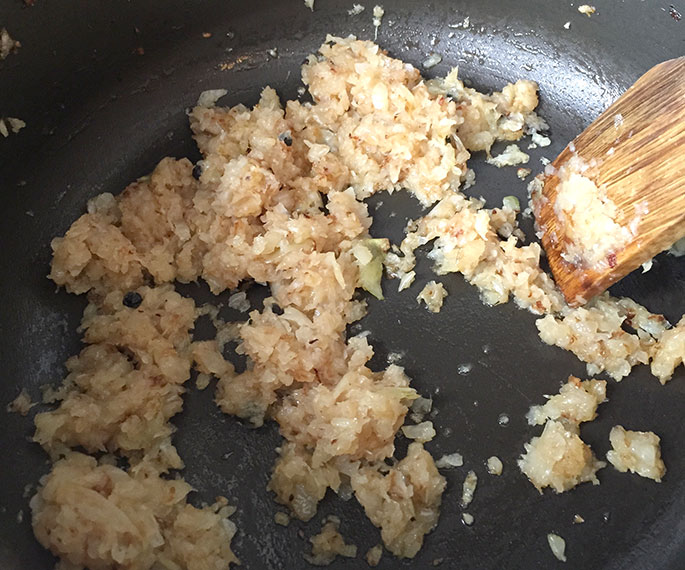
At this point, it’s worth taking the cinnamon stick/s out of the mix. I usually just fish them out with a fork once it’s infused the onions.
Now for spice time! This is when your ‘masala’ for the curry starts to form in front of your eyes. Tip in the gorgeously coloured turmeric, dhanajira and garam masala.
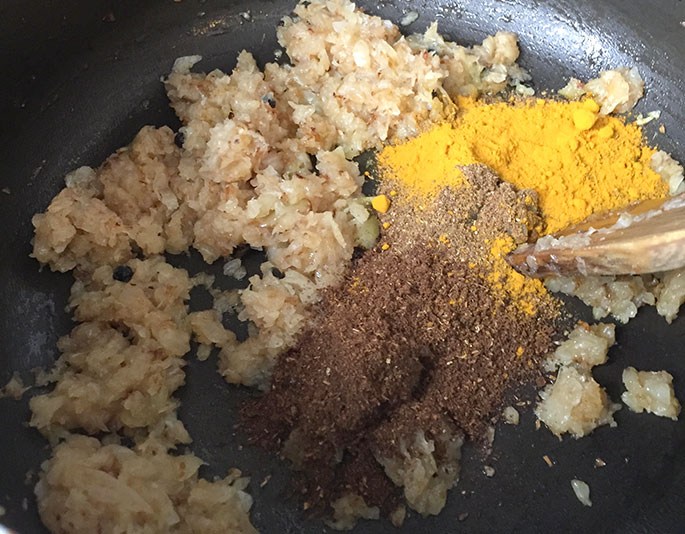
Now you can go ahead and add 2 teaspoons of salt. If it’s too little you can amend at the end. Cook all of this for under a minute on medium to low heat. It should come together like so:
To make a good masala base for most curries, tomatoes are your best friend. Now, some people use fresh tomatoes and if that’s the case – great! But, make sure they are ripe, fresh, good tomatoes. Not the crappy supermarket value ones that completely lack flavour. I just prefer to use tinned plum tomatoes as the flavour is always perfect and it makes a great base for masala’s. I always have a couple of tins stored in my cupboard. These are super handy for whipping up quick curries for dinner, as well as Italian food!
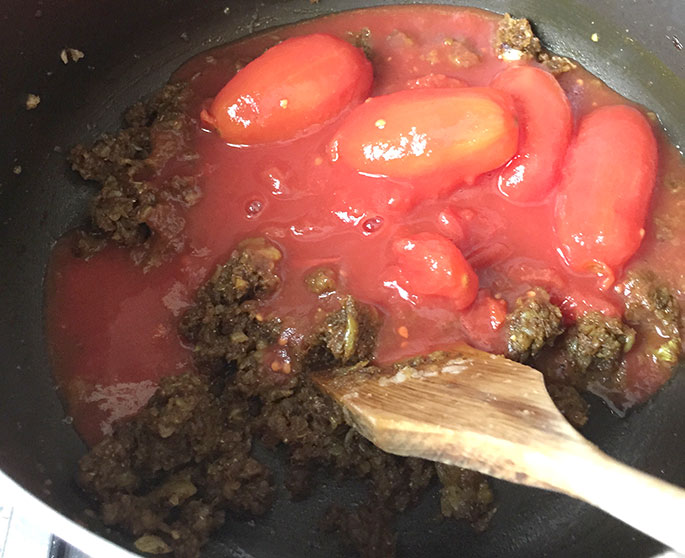
Give the mixture a good stir and don’t be afraid to forcibly mashup those tomatoes with your spoon. They’ll slowly disintegrate into the curry anyway, but you want them to be smooth-ish.
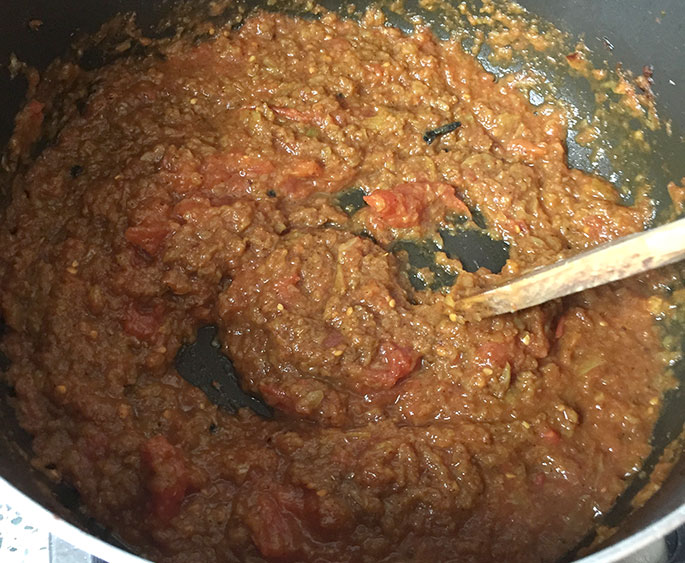
Now it’s beginning to look like a good curry masala!
Let that cook together a little bit (a few minutes should do it as you break the tomatoes in).
Now, get your magical chopper out again, or with a knife, chop up the chillis and mince the garlic and ginger. Once again, I just throw them all together into one and blitz. Easy peasy.
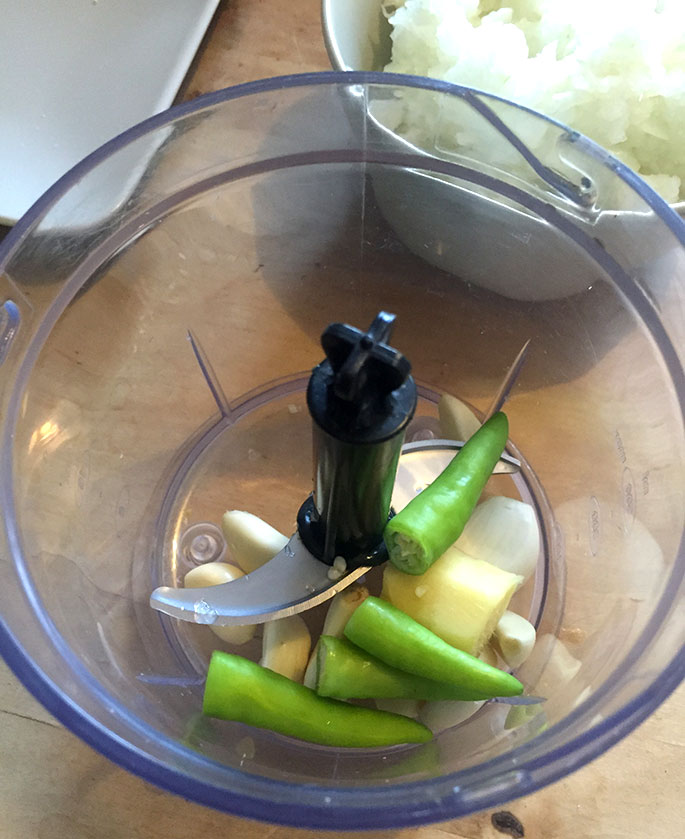
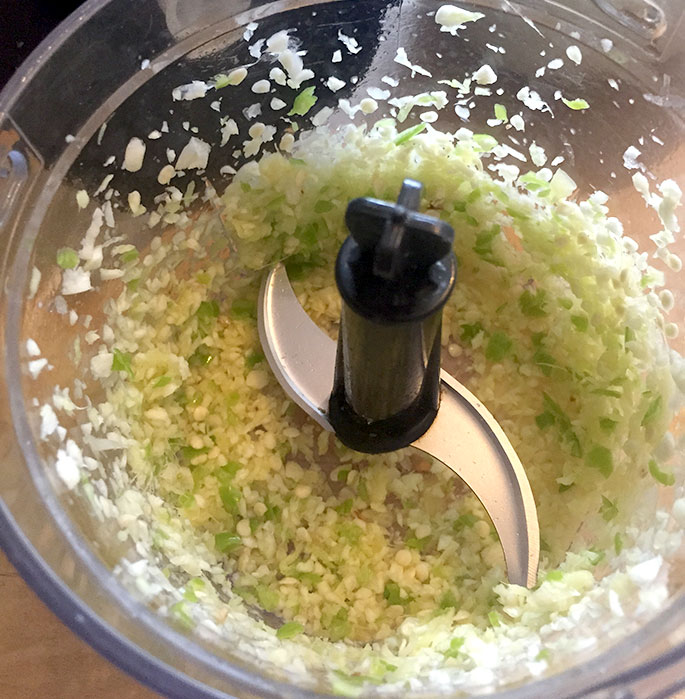
I went for 4 chillis but reckon I could have added 5-6. Remember, you’re adding no chilli powder to this curry. The fresh chillis are your sole source of proper heat.
Tip into the masala mix:
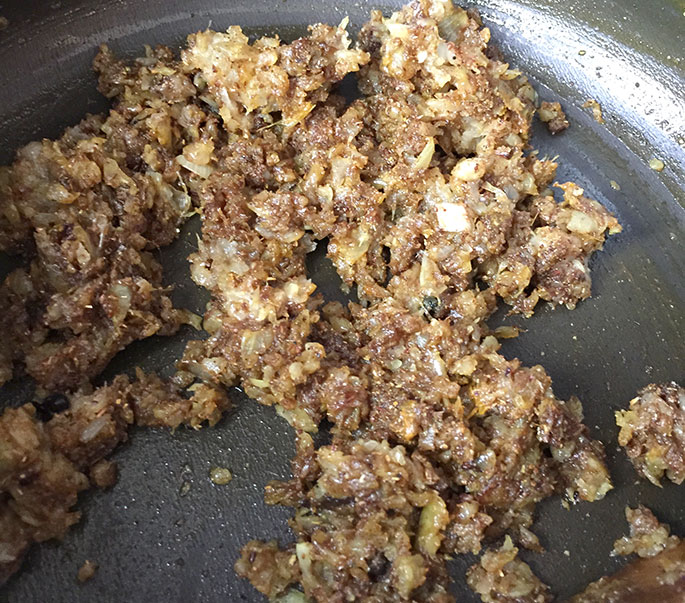
Once you’ve mixed together, you want to cook the masala on a medium heat for a minimum of 10-15 minutes. When it comes to curries, the magic is always in how patient you are with the masala and letting all the spices meld together in unison. Keep checking that it doesn’t burn and make sure you keep giving it a stir every now and again. This masala is now the holy grail to your Keema. Once cooked, you’ll feel it all coming together. It won’t be liquidy anymore but I suppose a bit more paste like, with the oil separating slightly. 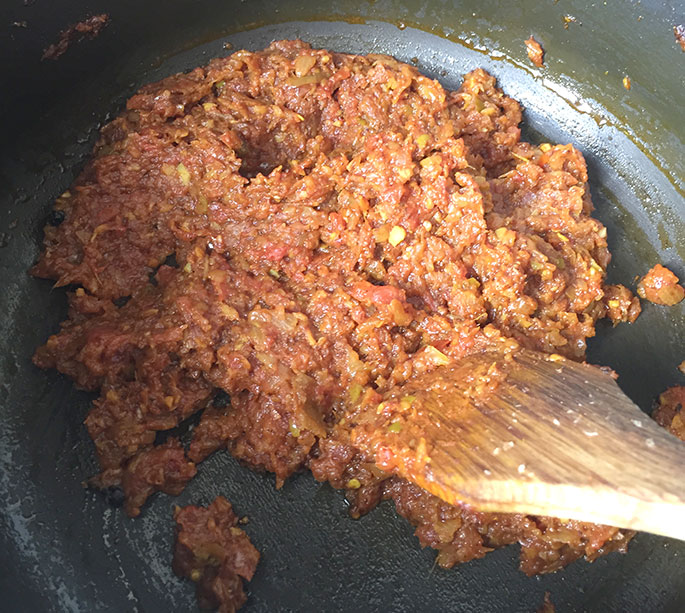 Now it’s time to add the meat! Tip it all in:
 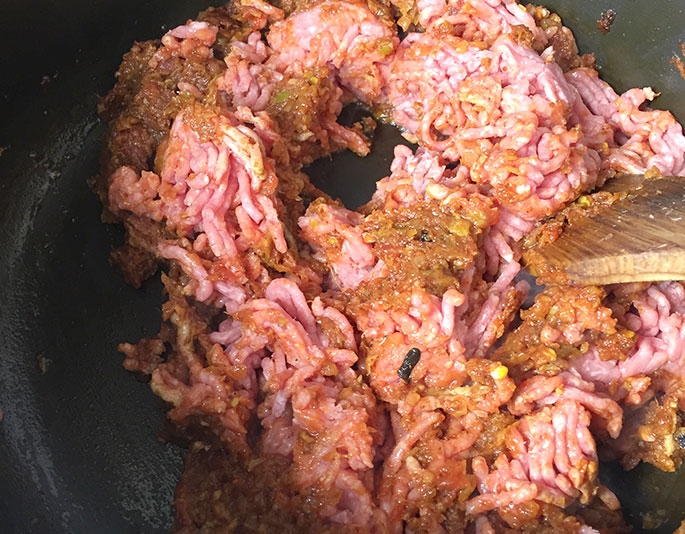 You want to give it a good vigorous stir so the masala covers it completely.
 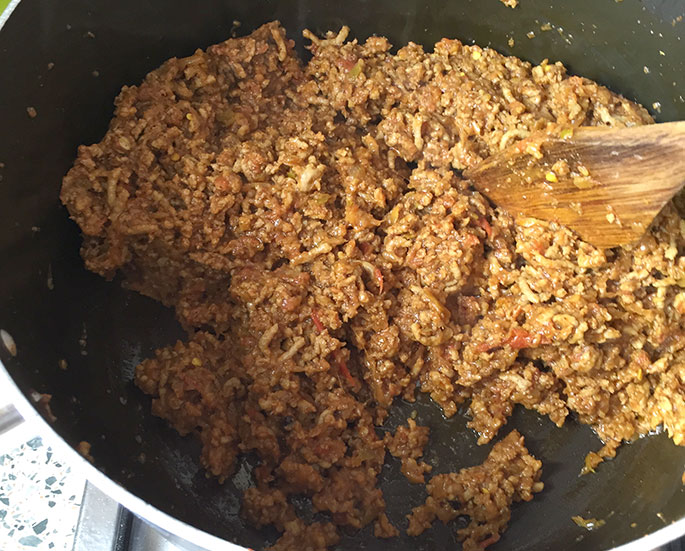 Now, pop the lid on and let it cook on a LOW heat. LOW heat people – remember this. Do not forget. You want it on a simmer with the steam locked in by the lid. It would be heartbreaking to come this far only to burn on this step.
 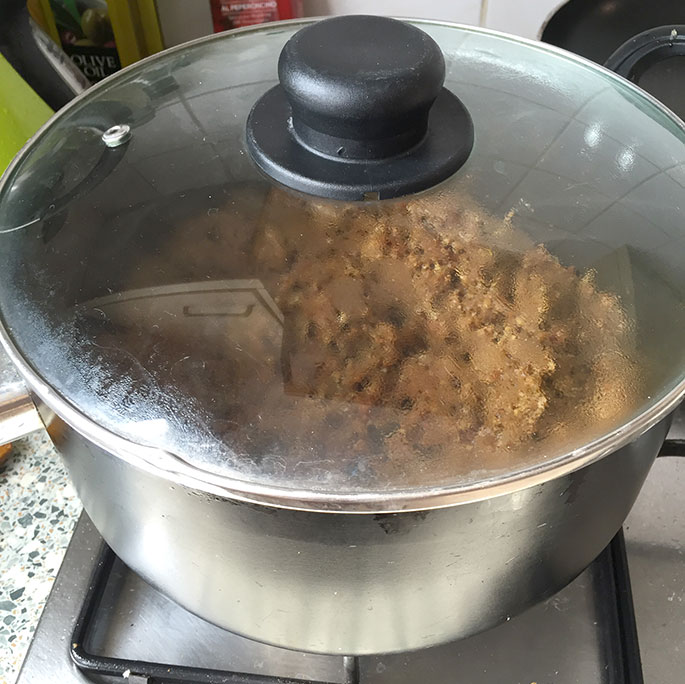 I kept this on a simmer for 25 minutes, but just before that ends, lift the lid and give it a good stir making sure it’s not sticking at the bottom. Now, throw in 2 large handfuls of frozen peas. I also like to taste for the salt and and spice at this point. If it needs more salt, go ahead! It’s also nice to put in a big heaped teaspoon of garam masala again to finish it all off.
 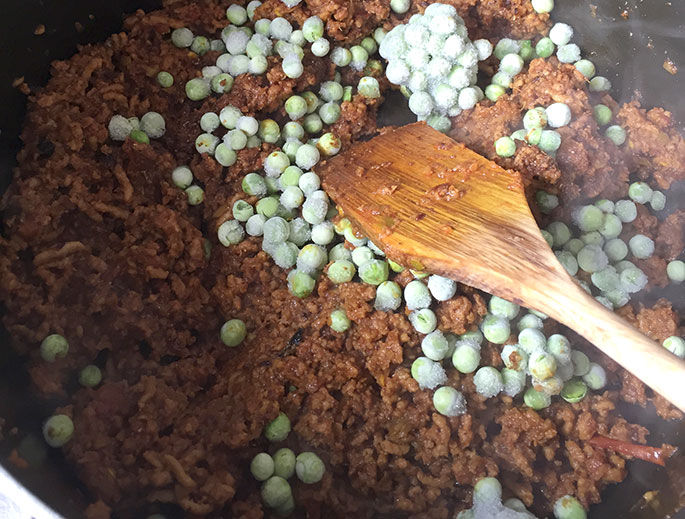 Cook for another 8-10 minutes with the lid on – taking care that it doesn’t burn on the pan anddddddd…. You’re done!
 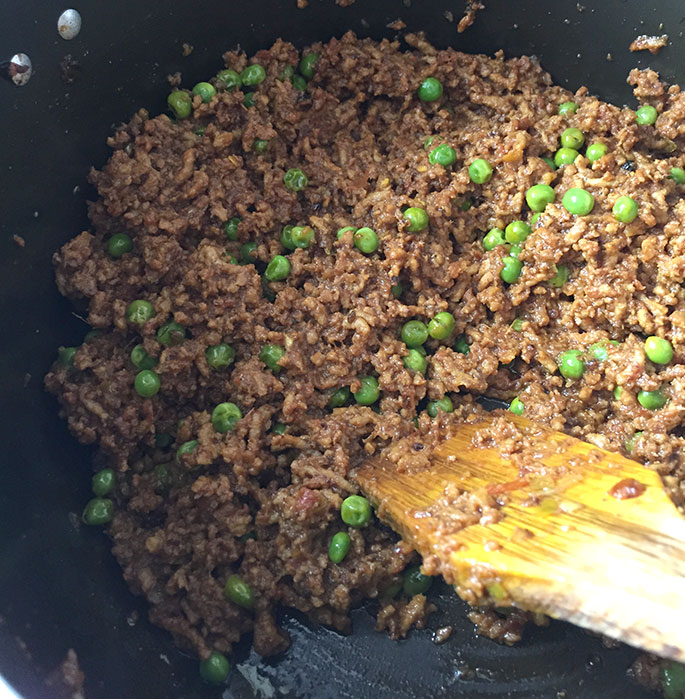 Ta-daaaa!
Roti
For the roti, or chapatti’s you’ll have to knead some dough. Or, if like me you have a dough mixer – use that. Again, (I like cutting down preparation time!) 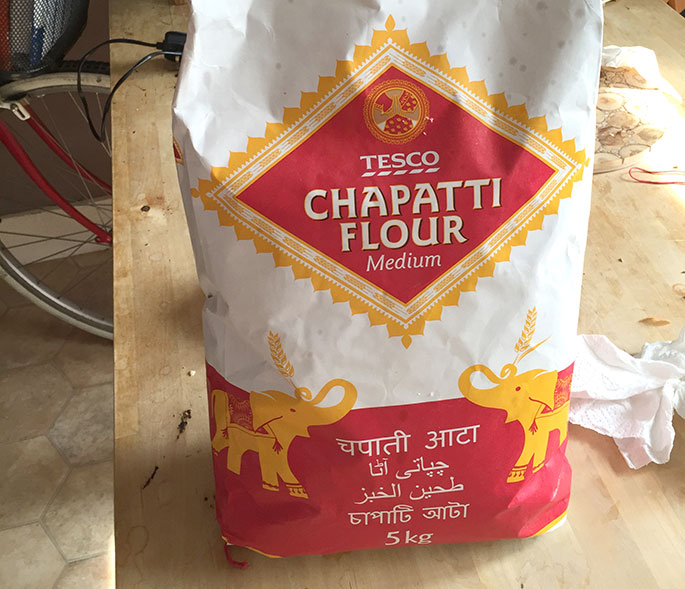 You’re also going to need a rolling pin, and a clean surface with more chapatti flour on top. If you don’t have a nice clean worktop then use a chopping board. You’ll also need a clean tea towel which I’ll explain shortly.
 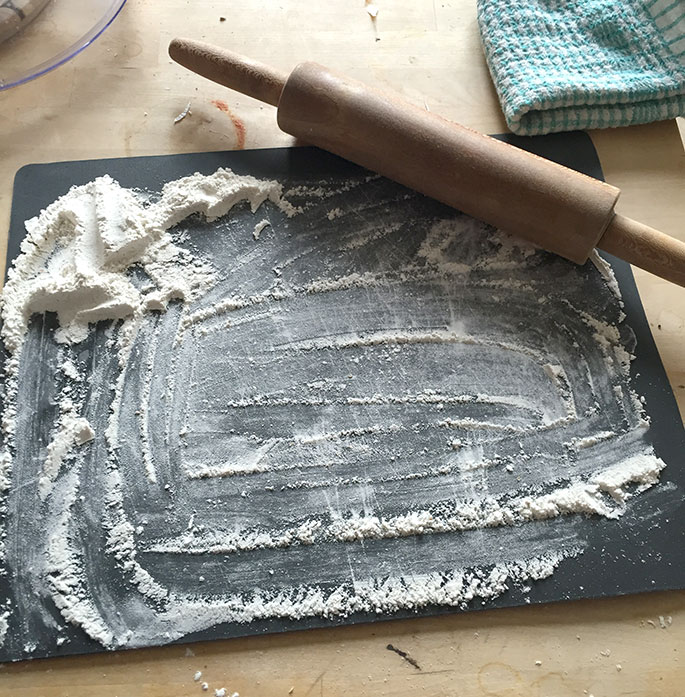 Add in the amount of flour that you need. I made 2 cups worth which comfortably makes 5 chapatti’s so if it’s just 2 of you, 1 cup is fine. Mix with a few splashes of water at a time. Half a cup of water should do it, but if it feels too dry and definitely needs more water, very cautiously add more. It’s so easy to accidentally put too much water in.
 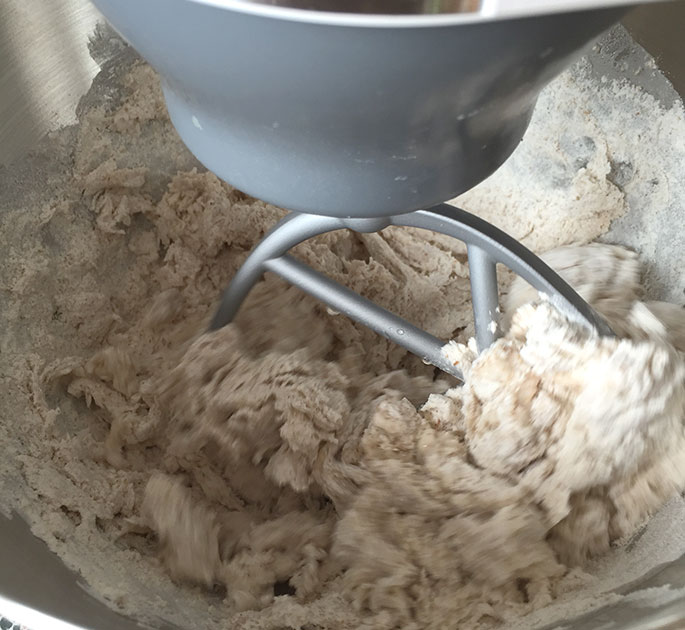 Now, I’ll run you through the process in writing but here’s a super, duper quick instavid of the process so you can see it in action:
Use the flour to coat your hands, pick up a scoop of dough (the flour on your hands will help stop it sticking all over your fingers!)
Turn into a ball.

Then simply flatten with your hand into a circle. A trick my mum taught me: go round the edges with your fingers and softly flatten. It’s the edges the rolling pin sometimes misses when thinning out and you don’t want to be left with a roti that’s cooked in the middle but too thick round the sides.

Once done, rolling pin to the ready!
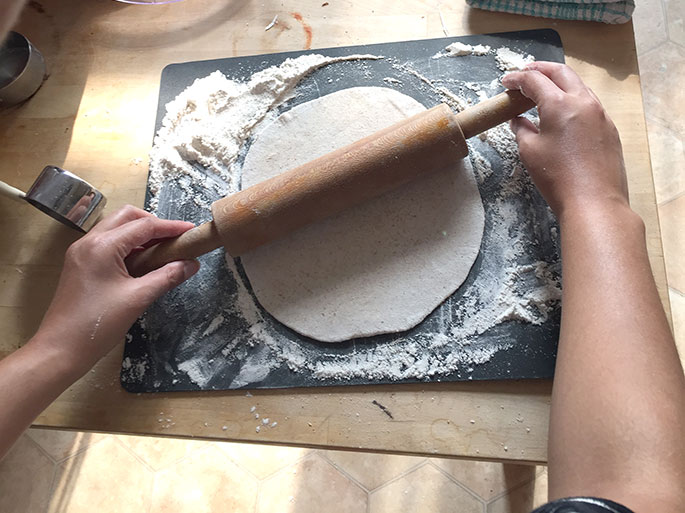
Before putting on to the pan, pick up the roti and toss between both hands. That’s a little complicated to explain in any other words, so do take a look at the Instagram video above. This simply helps get off excess flour, which is super important. You want to make sure you’re only using enough flour to ensure it doesn’t stick to the rolling pin and surface. If you coat it with the flour too much, you’ll get a horrible crispy dry roti once cooked with a slight yellow tinge.
Simply pop onto your pan.
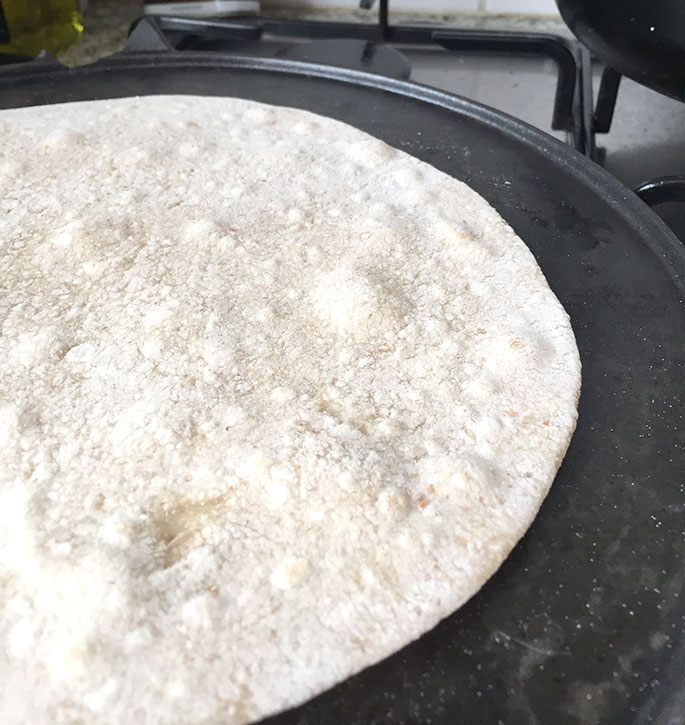
Now, I’m using a cast iron pancake griddle/pan thing. If you don’t have one of those, don’t sweat it. Just use your non stick frying pan, completely dry and make the roti’s a little smaller so it doesn’t hit the sides and fits properly into the pan.
As soon as you put it down, turn the heat up to medium high and after a few seconds when the colour starts changing – flip. Then you’ll see what is the above picture. It’s time to turn the roti again when air bubbles start forming.
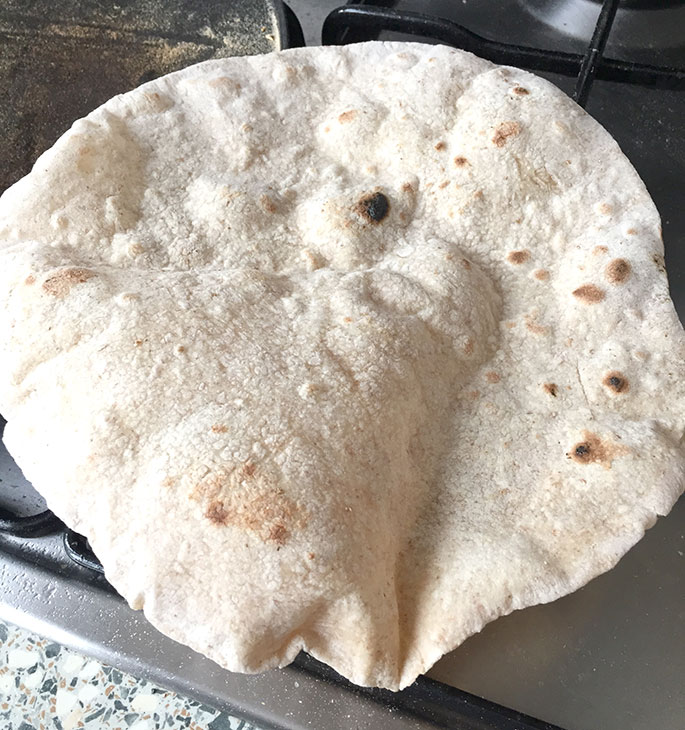
I use the clean tea towel to push down on the roti to generate more air bubbles where they haven’t formed, and eventually finish off by putting it over an open flame.
When I was little girl, I was told if your roti properly inflated, that meant the person eating it was extremely hungry.
I think that was more of a psychological tactic by my mum to get me to finish all my dinner.
Unfortunately, this time I only managed half the roti to air up, which I guess was accurate as I wasn’t ravenous. Yet…
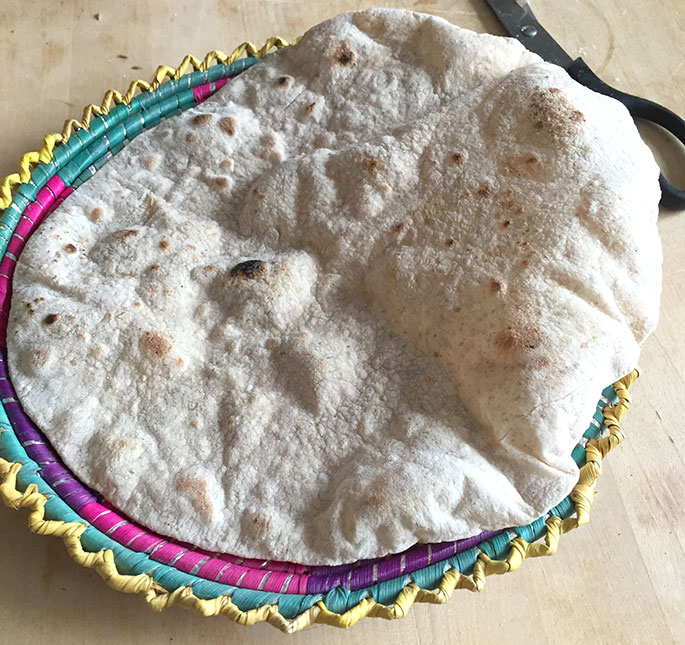
TA DAAA! DONE!
The eating part
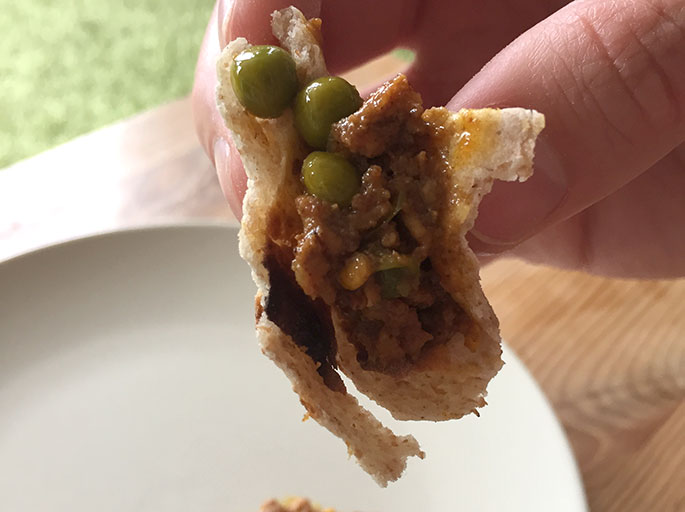
You can serve this curry, alone with the roti’s or you can also boil some rice to go alongside it to make a complete meal. The Keema re-heats really well, so you can make a batch and freeze it. Or you can have it for lunch the next day. Keema is so versatile, you can use it to make lamb samosas, or stuffed lamb parathas and naan! Yummy! I once even put a little western twist on it and added it to the classic cheese toastie!
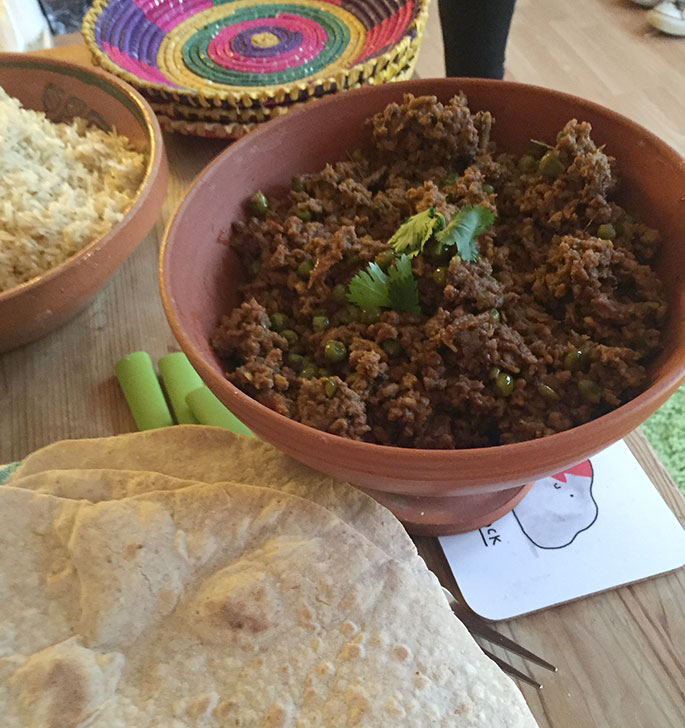
One of my favourite indian restaurants, Dishoom also have this dish on their menu as ‘Keema Pau’. They serve it with grilled burger/brioche buns. The various combinations you can do with Keema are endless as it’s such a delicious, versatile curry!
If you’re planning on making this, please do let me know – and if you’ve tried the recipe out already, share in the comments below! If you’re already a big Keema fan and have more serving suggestions, I’d love to hear about that too. 🙂